I have been asked to teach a class at Super Saturday. I made the mistake of standing next to our R.S. President as she picked up something at a boutique and I said " I could figure out how to make that" Guess what? Now she wants me to live up to my word. I thought might make a tutorial to help me teach the steps at the class. I have seen these on websites selling for as much as $32. Even if you go out and buy the wipe container and fabric you can still make it for about $5.
We are making covered travel baby wipe containers.
Materials needed.
travel baby wipe container
12x12 piece of fabric
1/2 yard of 3/4 to 1 inch ribbon
1 1/4 yard of 1/4 inch trim
scrap of batting for top.
hot glue gun and glue
1.Basically... fabric & trim is just hot glued onto the diaper wipe case. Cut your fabric larger than the case about 12x 12 inches
2. trace the lid and cut a piece of fiberfill to size. Place on top of wipe container and place fabric right side up on top of container.

3. starting in center top front hot glue a small strip. Fold the fabric under and glue to wipe case. I like to run the glue above the ridge on the case. Continue gluing the fabric on each side until you get to the corner.
4. flip the case over pull the fabric tight and repeat gluing the bottom of the case. We do not use batting on the bottom.

5. Now you repeat and do it to each of the sides.
6.When you get to the corners, you fold the fabric like you would as if you were wrapping a present. Trim away extra fabric & make sure that your case can still close properly.
7. Cut the ribbon for across the top and make bow. Glue to top of the case.
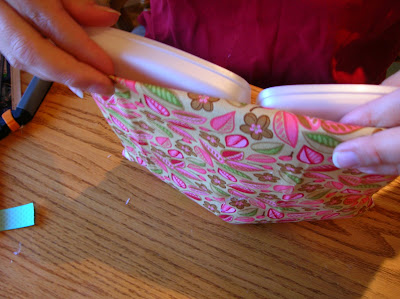
8.Now apply your ric-rac or any ribbons trim you like. Start & end at the back so that your case has a nice clean look I like to open the case to get a better angle . * The trim also covers any wobbly glued fabric . There...you're done.
8.Now apply your ric-rac or any ribbons trim you like. Start & end at the back so that your case has a nice clean look I like to open the case to get a better angle . * The trim also covers any wobbly glued fabric . There...you're done.

2 comments:
the instructions look great! I was just looking for some trim today. . . now I really need to make it.
-Penny Altima
Ok, mine is all done. It cost me about $4 to make mine because I had to buy the ribbon (1.29/yd) and trim (1.99/yd) that I wanted, but I had everything else.
I had the hardest time with glueing in the crease, but I think it turned out ok.
Post a Comment